Quick Setup
Complete the Quick Setup guide to publish your site faster and install the necessary plugins.
Quick links
Get started
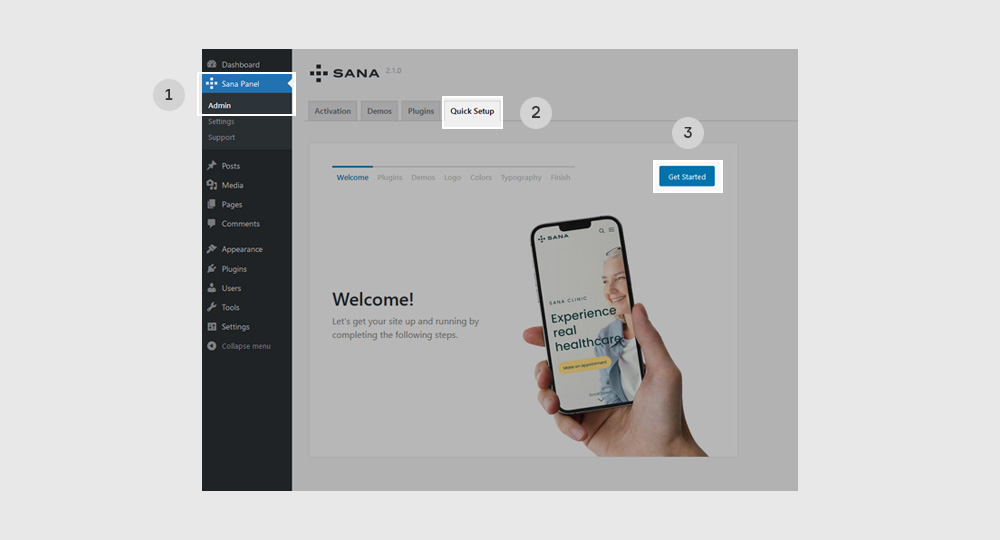
Once you activate your Sana theme, you will be redirected to the Quick Setup page. Here you will be able to install and configure some core elements of your site. This guide, although helpful, is not mandatory and you can access all these options directly in the Sana Panel settings.
1. Navigate to Sana Panel → Admin in the WordPress admin
2. Click the Quick Setup tab
3. Click the Get started button
Install plugins
Install the plugins from the list so that Sana can perform at its best. We have included tools that help you build content and expand your sites capability.
1. To begin the plugin installation, click the Install button and wait for the process to finish. This is the only step during the setup that cannot be skipped
2. Once the installation is completed, click the Next step button
Tip: Get an overview of all the integrated features that come with our plugins by navigating to Sana Panel → Admin → Plugins
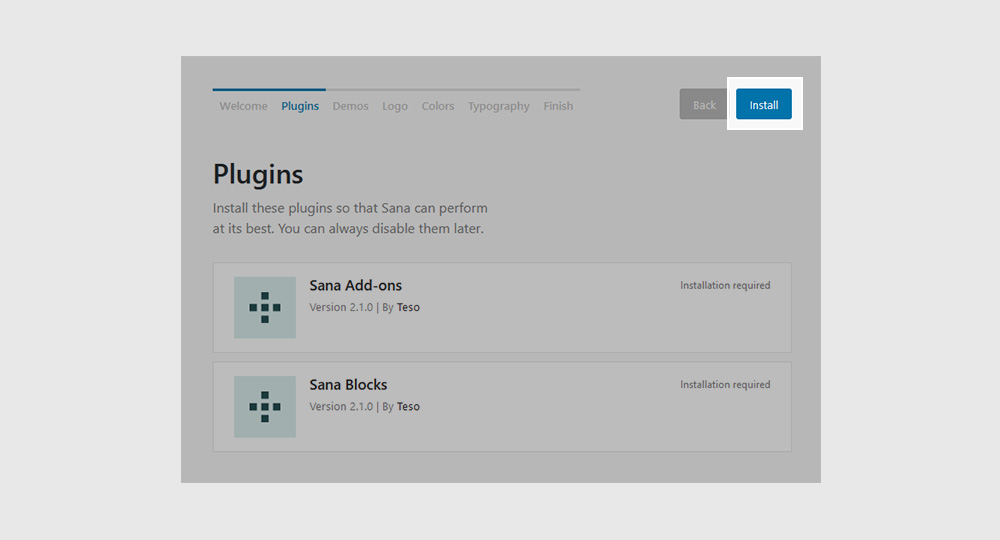
Note: Although you can always deactivate the installed Sana plugins in the Plugins page, we do not recommend doing so as this will remove essential theme features.
Load a demo
Use demos to speed up the building process. We have included premade templates for the most common medical practices. When installing a demo you can choose between loading only the theme settings and loading the entire thing (theme settings+content).
1. Select from the drop-down menu a practice that is closest to your business
2. If you wish to also load the demo content (media, pages, menus, posts, categories, tags etc.) check the Content box. If not, only the demo’s theme settings will apply (your content and structure will remain intact)
3. Click the Install button and wait for the process to finish
4. Once the installation is completed, click the Next step button
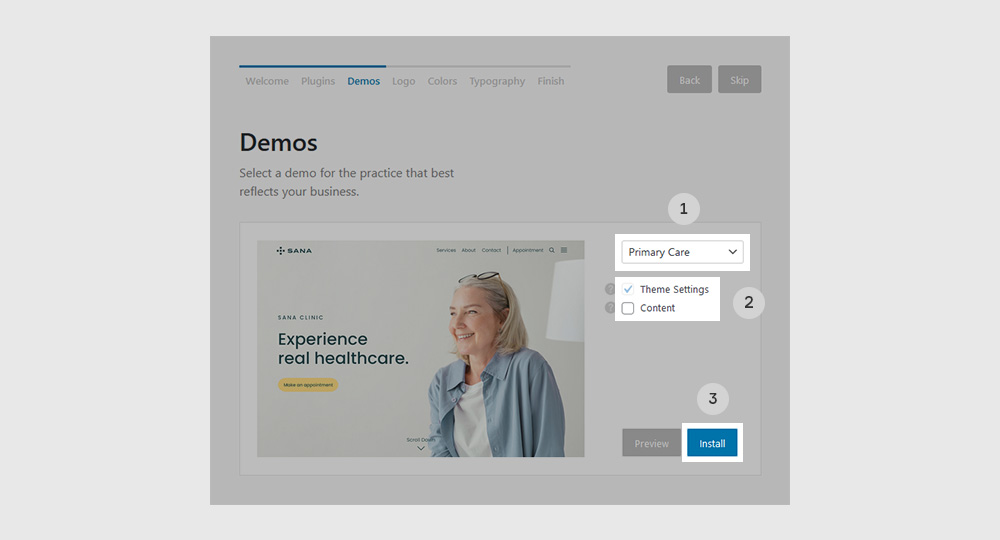
Tip: Click the Preview button if you wish to explore the demo in more detail (it will open in a new tab).
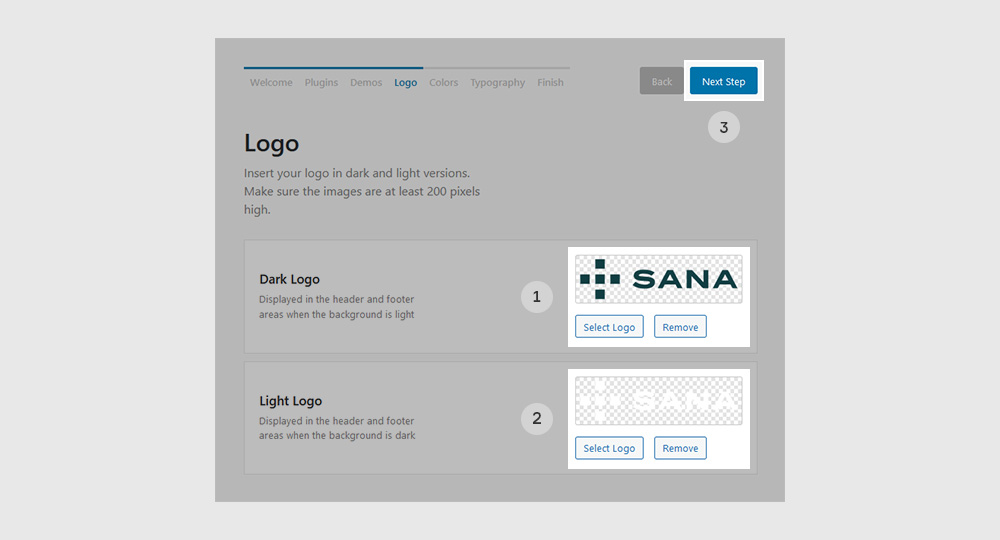
Upload logo
Your logo is displayed in the header, footer and login screen (optional). For best results, upload your logo in both dark and light versions. However, if you decide to upload only one version, this will become your default logo.
1. Click the Select logo button and choose the dark logo .png image from your computer
2. Repeat the previous step for the light logo
3. Click the Next step button
Note: We recommend that both images should:
- have the same pixel dimensions
- be in .png format, with transparent background
- be at least 200 pixels high
Set color palette
Sana has an integrated color palette that is composed of five primary colors. Changes made here are site-wide, effecting both your theme elements and your content as well. This is because Sana Blocks have your primary color palette available at hand.
1. Click on the color picker to edit any of the pre-set colors
2. Click the Next step button
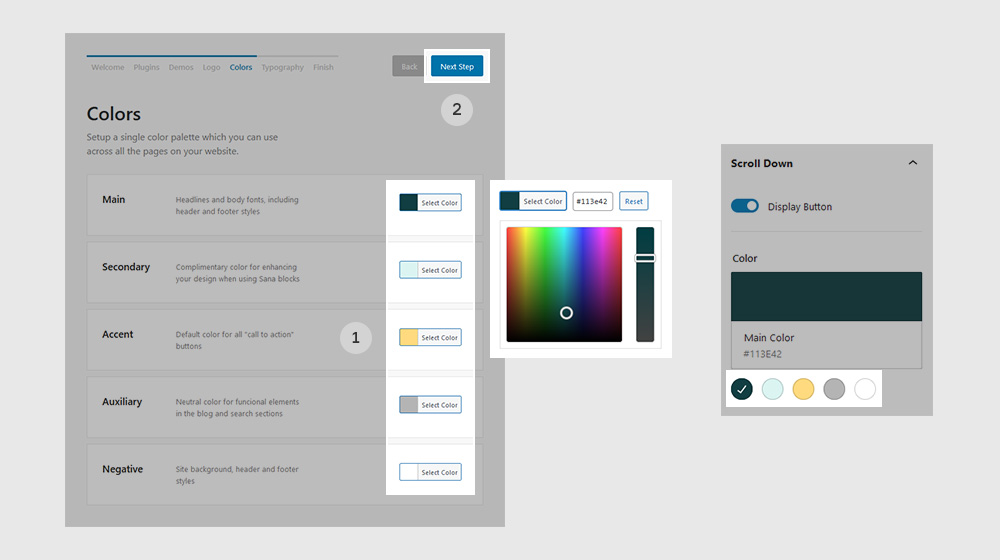
Tip: Follow the hints next to each color picker to learn where will the color appear on your site.
Choose typography
Select two fonts that work best with your brand. Sana is connected to the Google Fonts library, so you have over 1442 font families to choose from. That being said, if you wish to upload and use a custom font, we recommend installing a third party plugin.
1. Select a font family from the drop-down menu for your Main font. This will be your “workhorse” typeface that will be used throughout your site (excluding headlines)
2. Select a font family from the drop-down menu for your headlines
3. Click the Next step button
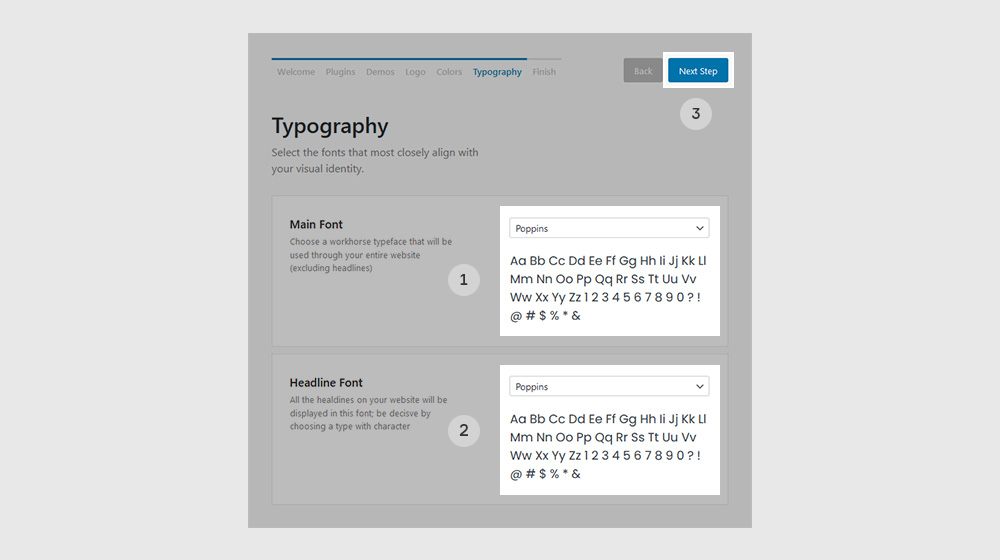
Tip: For more advanced typography settings, navigate to Sana Panel → Settings → Typography.
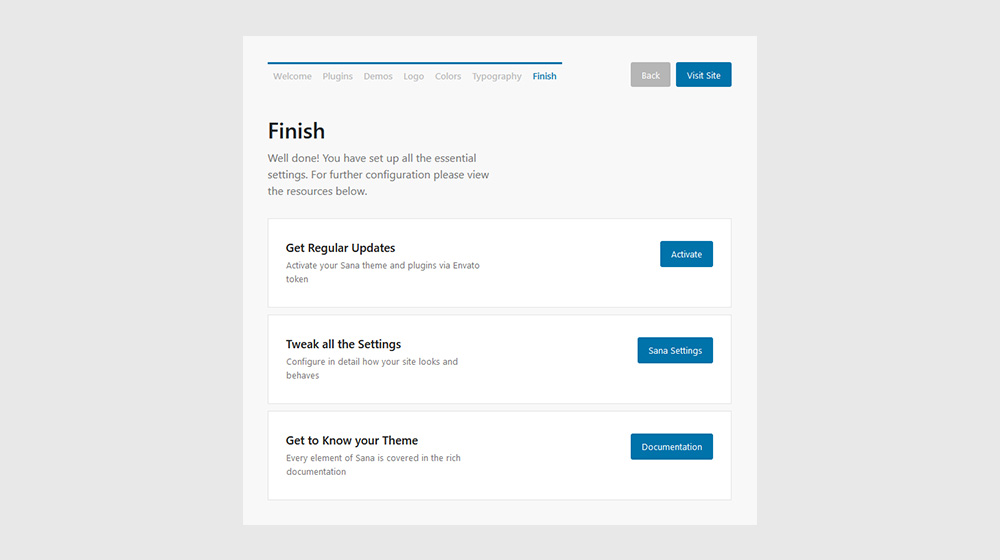
Finish
That is it! After completing the Quick Setup you will have a basic foundation for building your website. To change existing settings or access additional options go to Sana Panel → Settings.