Installation
In this section we will cover the basics on how to get started with your Sana theme.
Quick links
Download
There are two ways of installing your Sana theme, you can do it via WP Dashboard or via file manager in your cPanel. Here we will show you both methods. In any case, we first need to download the theme files, so let’s start there.
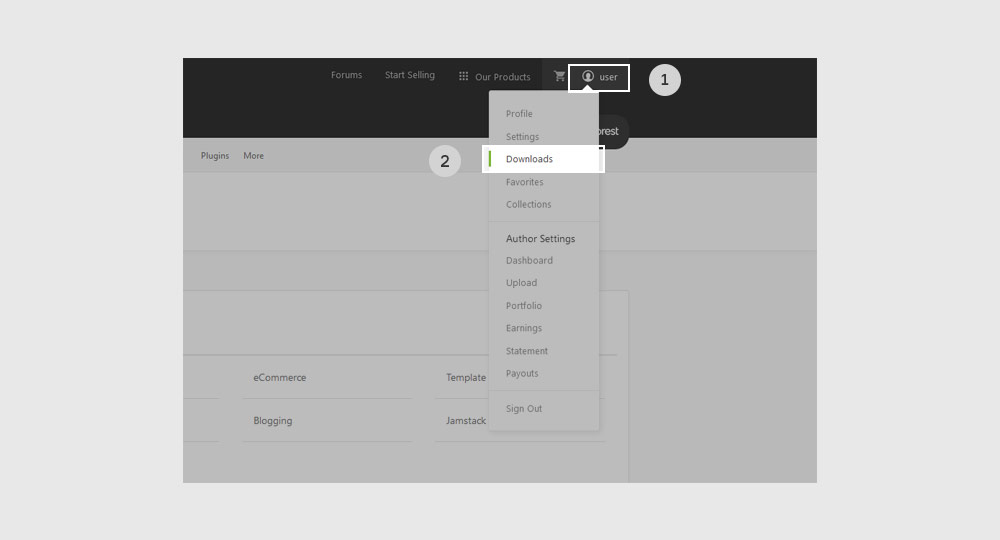
1. Login into your themeforest.net account and hover over your username in the top right corner
2. Click the Downloads link
1. Click the Download button within the Sana item box
2. Click the Installable WordPress file only button
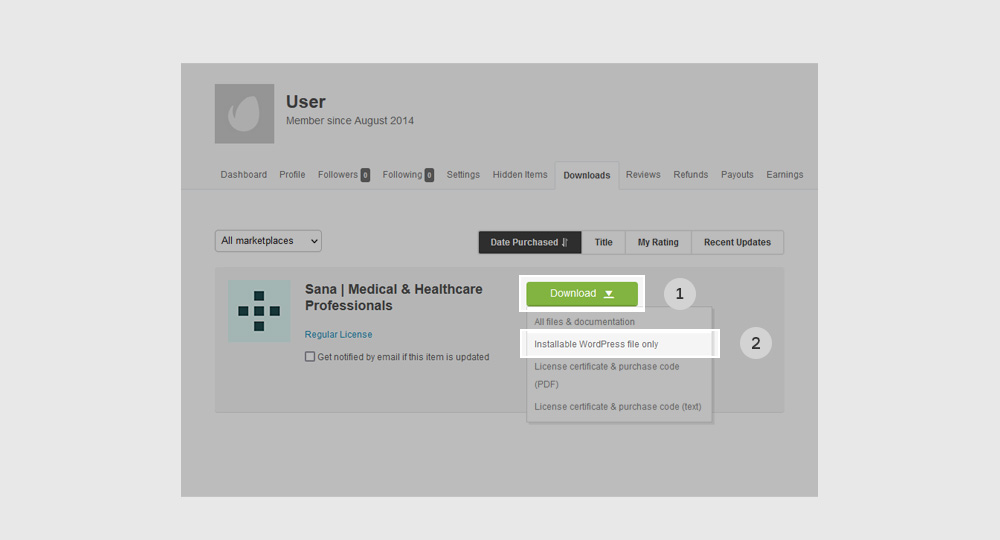
Note: If you download the entire theme package by clicking the All files & documentation button, you must first unzip the package and extract the sana.zip file for installation.
Installing the theme
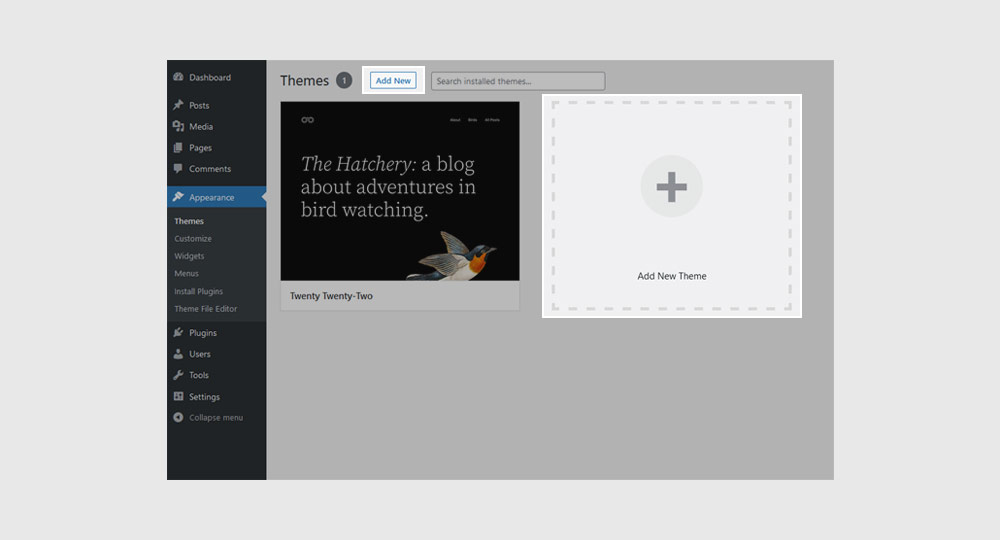
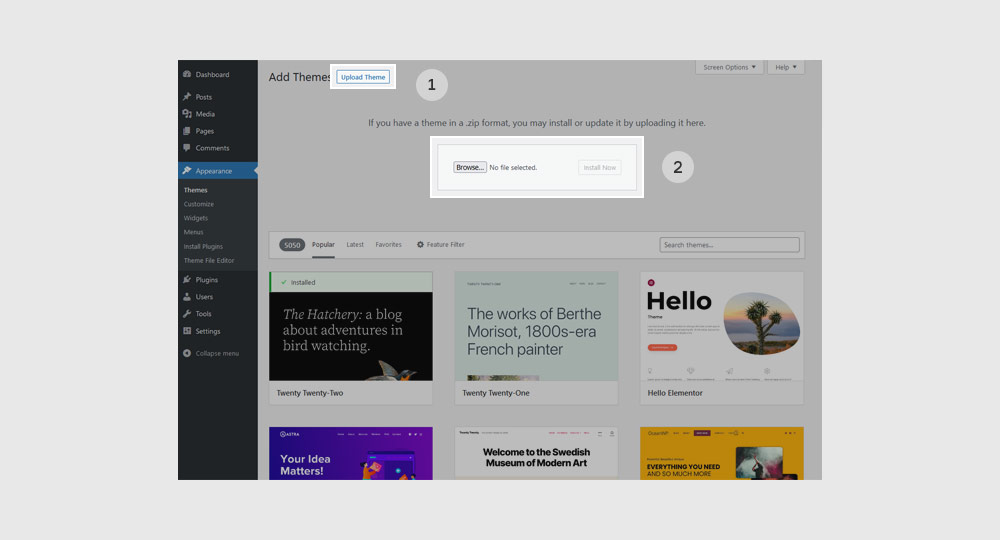
Your default installation method will be via the Dashboard. If you are new to website building, this will also be the easier option. Navigate to Appearance → Themes and click the Add New button.
1. Click the Upload Theme button
2. Click the Browse… button/box to open up the file manager
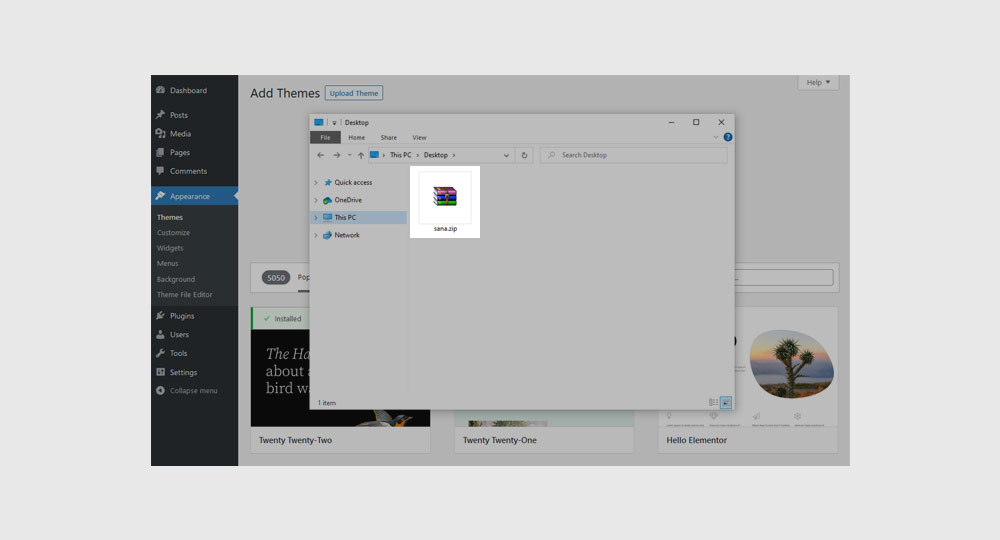
Select the Sana.zip file in your file manager.
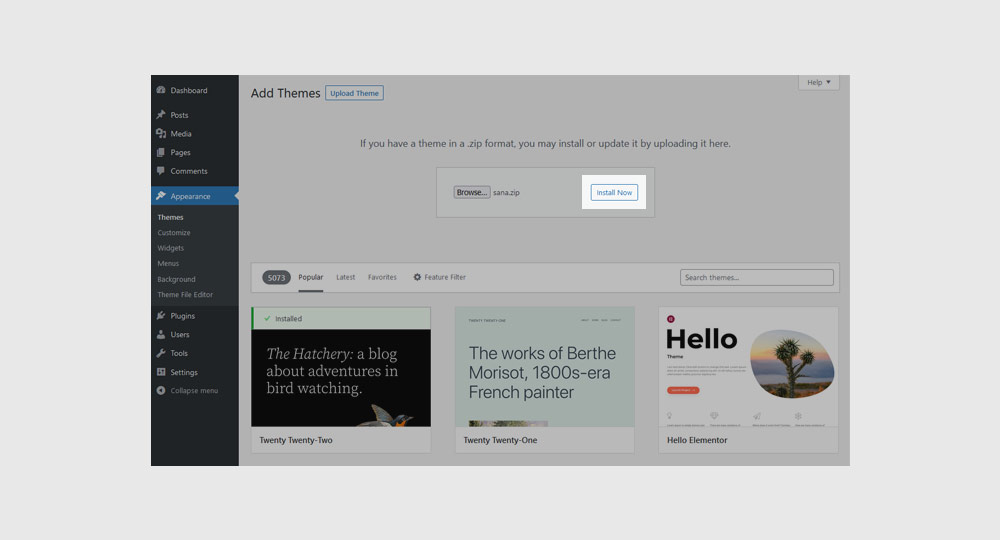
Once the file is loaded, click the Install Now button.
Wait for the installation process to finish and then click the Activate link.
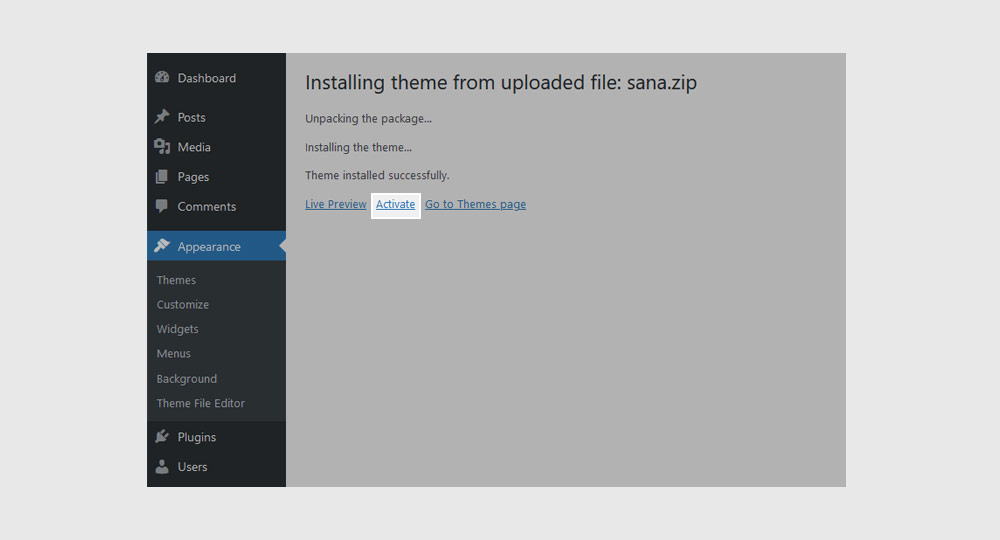
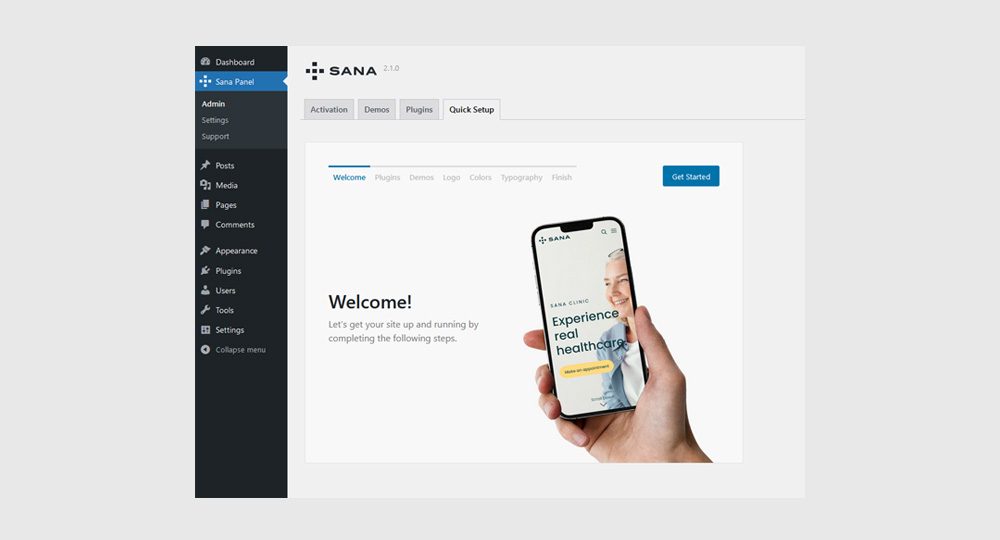
When you activate the theme, you will be redirected to the Quick Setup page. Learn more on the next page.
Direct upload
This method is useful if for any reason you don’t want to use the Dashboard or you want to try the advanced way to install a WordPress theme for your site.
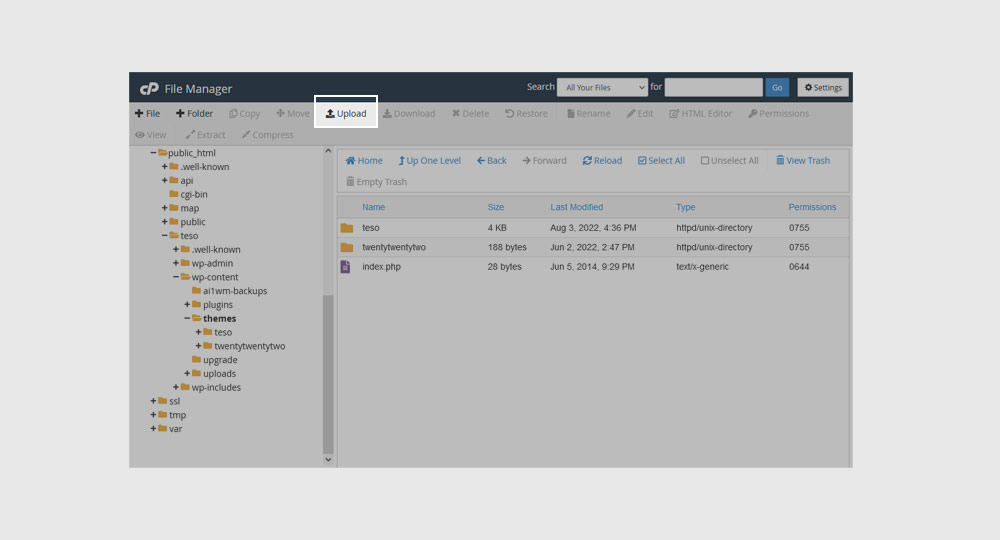
1. Upload the Sana.zip theme file to your hosting (using a FTP Manager or the File Manager from your cPanel) in the directory /wp-content/themes/
2. Extract (unzip) the file in the same directory
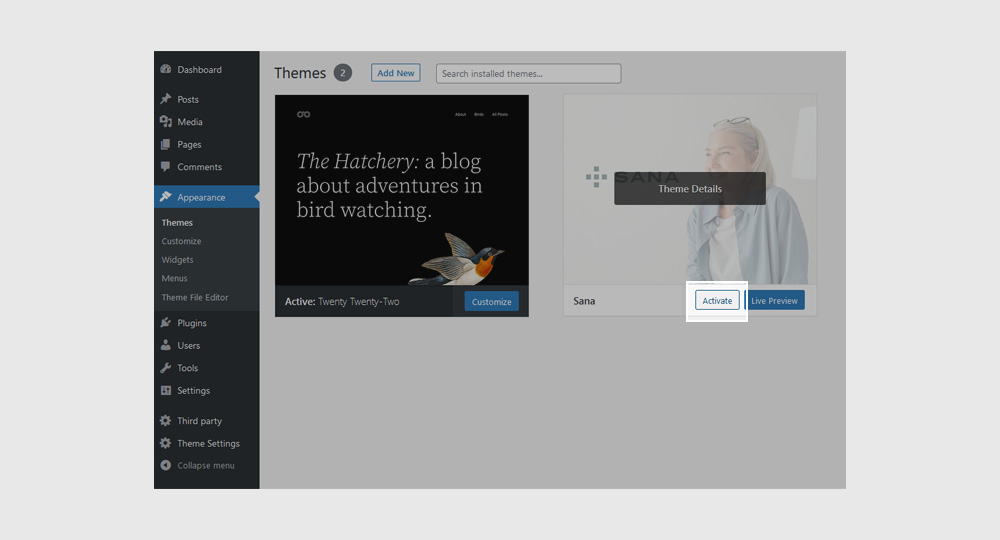
In the Admin Panel navigate to Appearance → Themes. You will see your newly uploaded theme listed there. Hover your mouse on it and click on the Activate button.